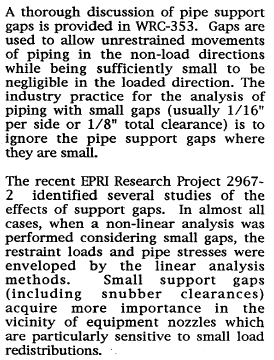
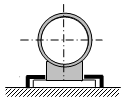
Guide support structure allows displacement along the pipe axis. It differs from a resting support in that it has stops restraining displacement perpendicular to the pipe axis in the horizontal plane. A single-directional guide support restricts downward displacement, while it is disabled during upward displacement. A double-acting guide support is never disabled. Friction forces created during horizontal sliding restrict longitudinal displacement.

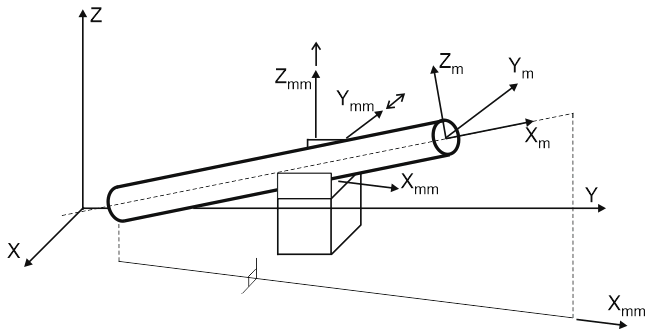
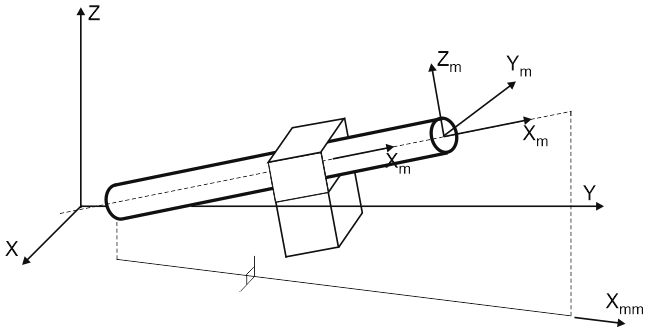
See. Global and local coordinate system
Guide support allows displacement along the pipe axis. It differs from a resting support in that it has stops restraining displacement perpendicular to the pipe axis in the horizontal plane. A single-directional guide support restricts downward displacement, but doesn't restrict upward displacement.
These supports are modeled with two linear rigid restraints (vertical single-directional and horizontal double-acting) and a friction force along the pipe axis.
These supports can be placed on inclined pipe elements with a angle to horizontal plane up to 18 degrees. Sliding surface is considered always horizontal. If inclined sliding surface needed - the custom restraint shall be used.
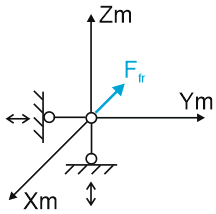
See. Global and local coordinate system
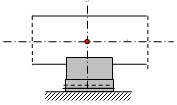
This support functions in the same way as a single-directional guide support, but it is doesn't allow upward displacement. It can be used for modeling sleeve, pipe pass through the hole etc.
This support is modeled with two linear rigid restraints (double-acting by Zm axis and horizontal double-acting by Ym axis) and a frictional restraint along the pipe axis Xm.
Support can be placed on inclined pipe with any angle including vertical. Friction direction is always along the pipe axis Xm.
The gaps can't be specified for a vertical pipes. If needed to specify the gaps for a vertical pipe guide - the custom restraint shall be used.
See "custom restraint links"
Property |
Description |
Name |
Element name. If checked then it shown in 3D view |
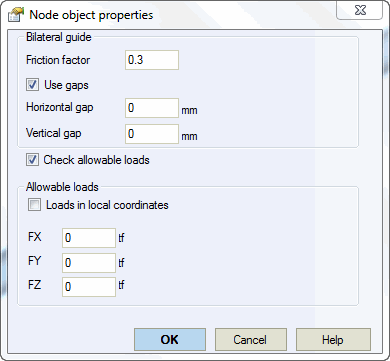
Friction factor |
Friction factor is the same for sliding on the support horizontal surface and stop vertical surface. If different friction factors must be input, use a custom restraint. |
Check allowable loads |
START-PROF automatically checks allowable load values against analysis results. If allowable values are exceeded, the corresponding warning is displayed |
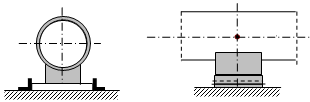
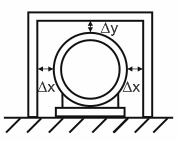
Horizontal gap ∆y, vertical gap ∆z |
Gap ∆y is between the pipe and limiter to the left and right, gap ∆z is between the pipe and the limiter on top. The bottom gap is always 0. It is incorrect to add mounting tolerances, used to facilitate installation, as gaps into piping model. Usually there are a lot of such gaps (in each support) and they are very small (1-3 mm). If such gaps are specified in the model the serious problems with iteration convergence may occur. Please remove such small gaps from the model. It is needed to specify only big structural gaps, that are controlled during installation. For example the limit stops, anti-seismic stops etc. Usually such gaps are big (>5 mm) and their number is few. START-PROF ignore gaps of less than 5 mm, because considering so small gaps usually useless, but spoils iteration process. This protects inexperienced users from making a mistake. If gap less than 5 mm is really needed, please use custom restraint with gaps. Analytical considerations in the code qualification of piping systems by G.A. Antaki says:
NORSOK L-002 2009 3rd Edition, sec. 6.17.1 says:
Adding the small gaps (for example 1.5 mm) is incorrect, because no one monitors the gap implementation in reality. Doesn't measure them with calipers to ensure that it is exactly 1.5 mm. Adding such gaps to the model reduces the conservativity of the model. And in case if you can't be sure with it's implementation in reality it's better to perform analysis without gaps. It is safer. And also iterations convergency is much better. |
Loads in local axes |
If not checked, allowable loads are set for global coordinate axes; if checked, they are for local axes of the adjoining element |
FX, FY, FZ |
Allowable load values for the X,Y and Z axes, respectively |
To insert an element, select the desired node and use: Insert > Insert Restraint > Guide (Single-directional), Insert > Insert Restraint > Guide (Double-acting)
or press the  or
or  toolbar icon.
To view properties of an existing element:
Double-click the element in the 3D view
Select the
element and press the  toolbar icon